Only a Technical Contact of a registered Site can add a node to a site. Make sure to have uploaded your SSH key before proceeding.
Nodes must be connected to the internet and have a public IP address, they should be outside of a firewall, without NAT and have access to local DNS servers.
It is recommended to not have an IDS or Proxy upstream of the node
The following information is required for the installation:
- Network interface MAC Address
- public IP Address
- Netmask
- Gateway address
- Broadcast address
- Two DNS servers
The recommended hardware configuration for a machine is the following:
- 4 GB RAM
- At least 160 GB hard disk
- At least 1 Mb/sec connection to the Internet
- 4x Intel cores @ 2.4Ghz (e.g., quad core or 2x dual core)
- External PCU or built-in, remote-access power-reset capability, accessible from PLE, such as IntelAMT, HPiLO, DellRAC, IPMIv2, etc.
Linux KVM virtual machines are also supported as long as the hardware specs are met.
You can review the complete hardware and network requirements:
Node installation:
-
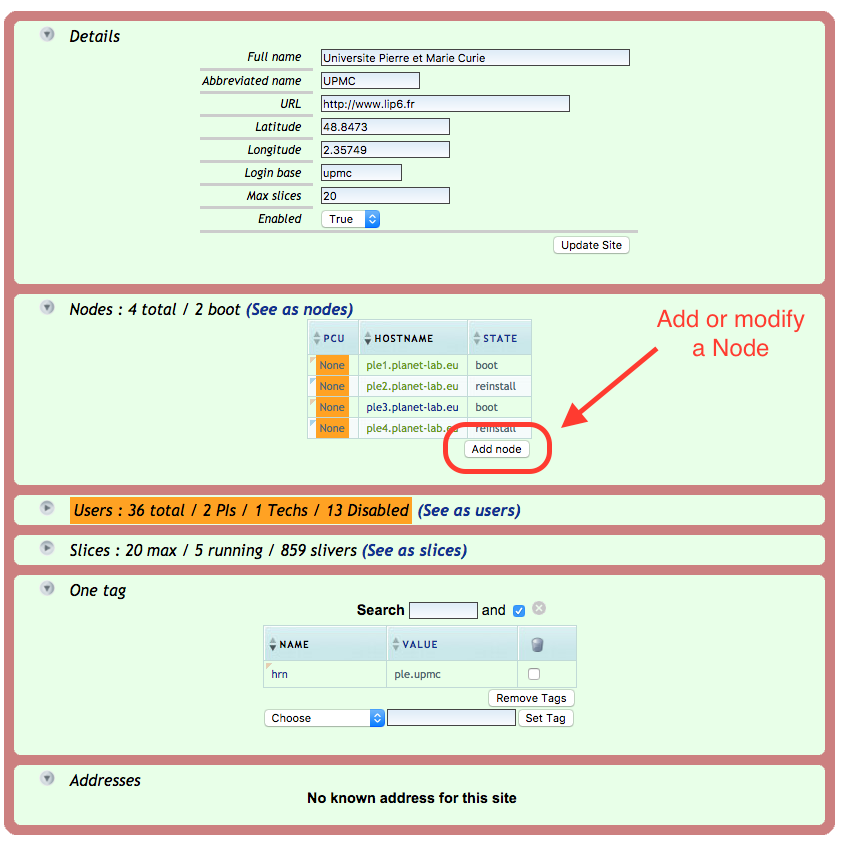
If the node has not been created yet go to your site page and click on the "Add node" button as shown in the picture,
alternatively you can follow directly this link and go to step 2: https://www.planet-lab.eu/db/nodes/node_add.php
If you are modifying an existing node go to step 3.
-
Select from the list your site and fill up the information for your node, in particular Hostname and network information.

-
Once the node has been created you will be presented with the node view, verify the information before proceeding.
In particular the network information as we need to add the MAC Address of the interface.
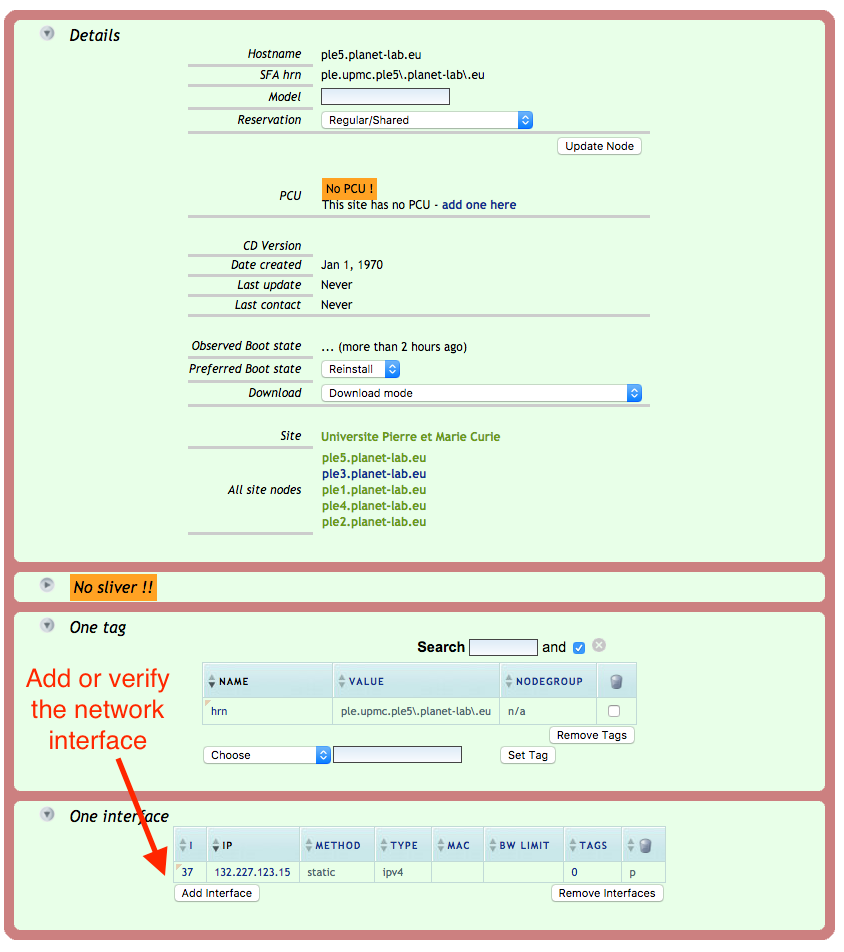
-
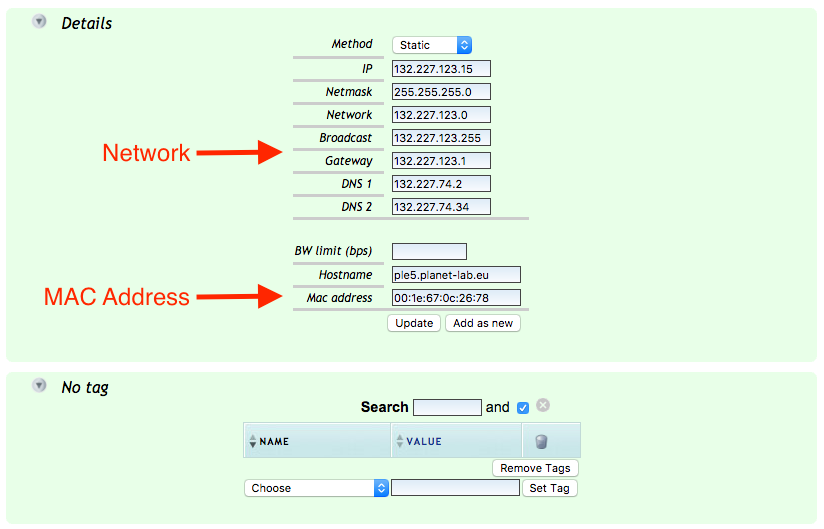
Again in the network interface view verify the network information and fill in the MAC address of the interface.
If you don't have the MAC address of the interface of your node you can either get this information in the BIOS of your machine or
boot temporarily the machine with a Linux live CD and issue the command:
ip a show dev eth0 | grep link/ether | awk '{print $2}'
-
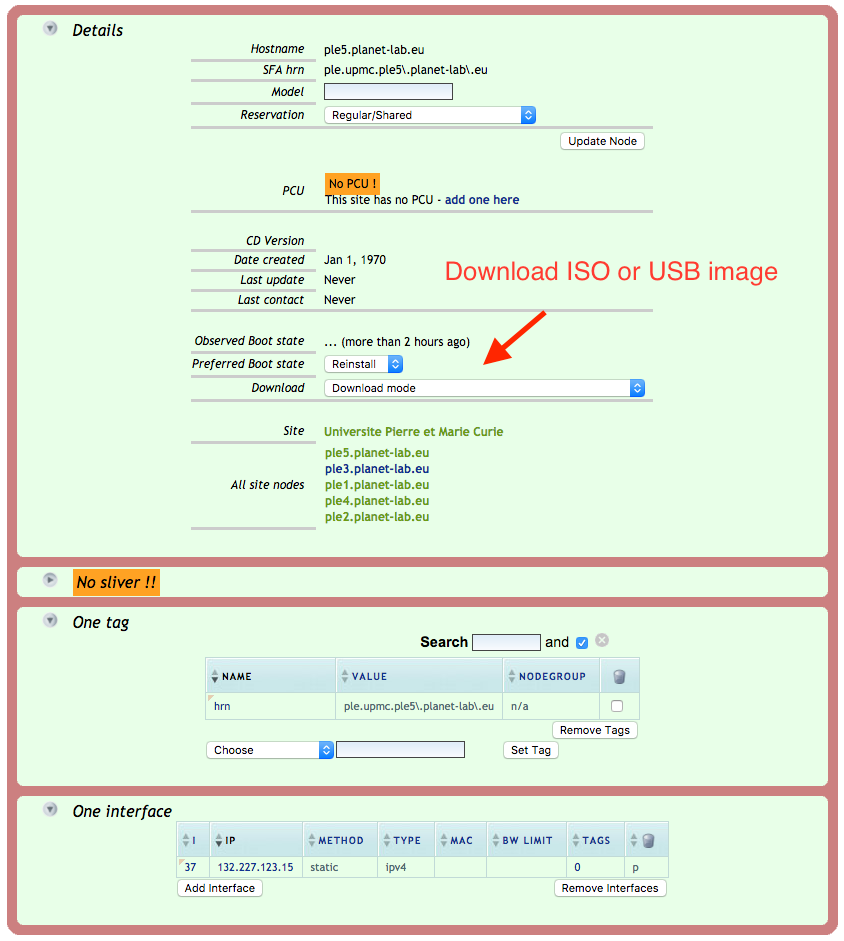
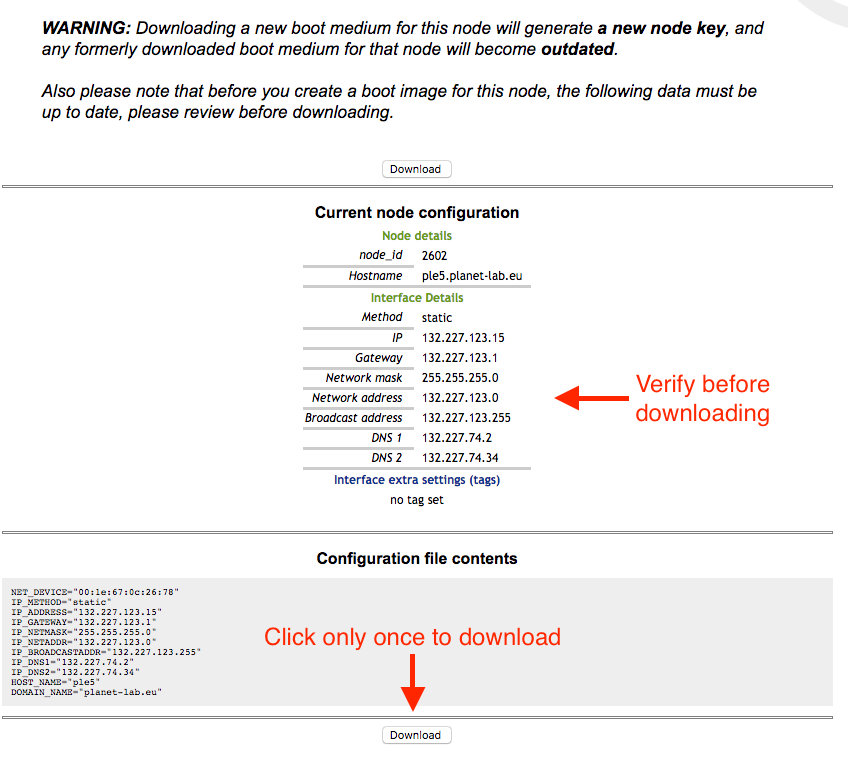
Once done you can proceed to download the ISO or USB stick image. Go back on the node page and click on the pull down menu
to download the image. Select the one more appropriate for you. We suggest you use an USB stick of 1GB to 4GB.
-
Once again double check the information for your node, this information is used for creating the boot image, so in case
of any change you might make later you will have to download again the image and reinstall it.
-
Once the image has been downloaded proceed with burning it on CD or copying it on USB. For the USB image with Linux/macOS you can use the dd command:
$ dd if=node.yourhostname.com-x86_64-5.4.usb of=/dev/sdc
Where /dev/sdc is the device of the inserted USB key.
You can also use one of the following utilities:
For windows:
https://rufus.ie
For MAC:
https://www.balena.io/etcher
-
Insert the CD/USB stick into the node and reboot. Make sure the node always boots from CD/USB and don't remove either from the node. In case
a reboot is needed the node will always boot from the external device (CD or USB)
-
The installation will take several minutes depending on network connectivity and the machine resources. You will receive an email when the installation completes
and you should be able to login via ssh with the use "site_admin" (please make sure to have added your public SSH key to your user).